Heat loss in piping systems rarely arrives as one dramatic failure. It builds through bare flanges, crushed insulation, open valve bodies, and wet jackets. In steam, hot-water, or process lines, these small gaps can increase energy use and reduce outlet temperatures. They may also cause condensation, corrosion, or uncomfortable work areas. This guide examines how to prevent heat loss in piping systems through practical design, installation, and maintenance choices. The focus remains on details engineers and technicians can inspect in real facilities.
Effective control begins with matching insulation to operating temperature, moisture exposure, and mechanical conditions. Mineral wool, cellular glass, calcium silicate, and elastomeric materials each perform differently. Insulation must cover straight runs, elbows, flanges, strainers, and valve bonnets. Removable covers help maintenance teams protect components often left exposed. Proper supports matter too. Poorly designed supports compress insulation and create cold bridges. Sealed vapor barriers deserve special attention in chilled or humid environments.
The discussion also considers heat tracing, reflective jackets, expansion allowances, and temperature monitoring. Infrared surveys can reveal warm spots, but they cannot explain every loss without field verification. A damaged jacket may look minor. It may not be. Reliable results depend on correct thickness, clean installation, documented inspections, and honest performance checks. No single measure solves every system. Sometimes the overlooked flange matters most. These ten approaches provide a practical starting point, while allowing for site conditions, budget limits, and lessons learned after installation.
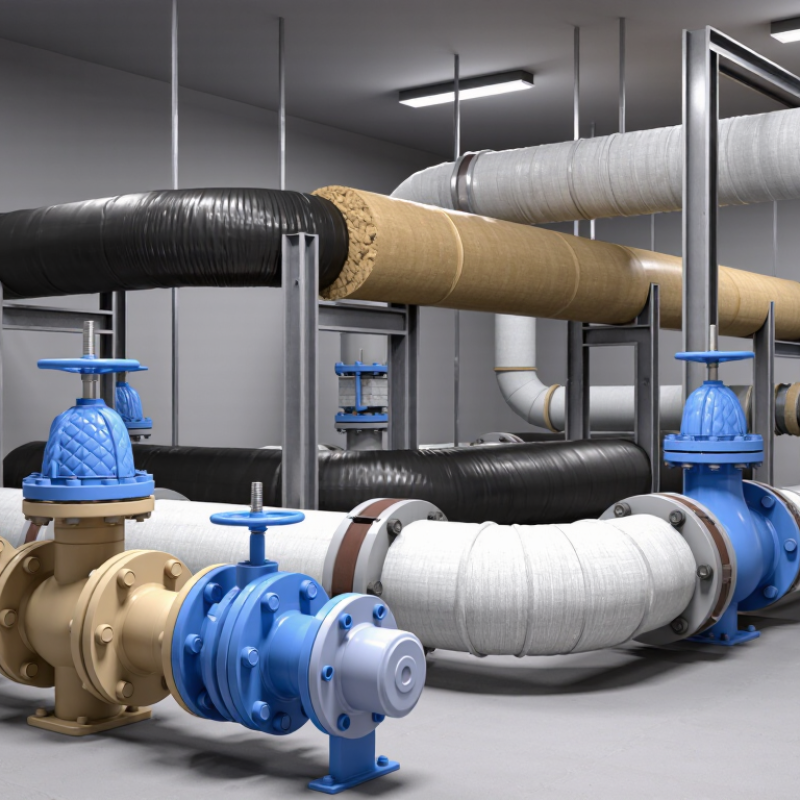
Heat loss begins when warmer pipe surfaces transfer energy to cooler surroundings. Conduction moves heat through the pipe wall, while convection carries it into moving air. Radiation also matters, especially on exposed metal surfaces. In field inspections, damaged insulation often causes surprisingly high temperature drops. Small gaps matter.
Effective control begins with accurate heat-loss calculations. Measure fluid temperature, ambient temperature, pipe size, flow rate, and operating hours. Select insulation thickness for the real conditions, not a convenient estimate. Seal joints carefully to prevent air movement and moisture entry. Insulate valves, flanges, and supports, which are common thermal bridges. Use durable cladding where impact or weather may damage the insulation. A vapor barrier is essential in cold or humid environments.
Temperature monitoring can reveal problems before production suffers. Sensors should be placed near tanks, bends, valves, and long exposed sections. Infrared surveys are useful, but surface emissivity can distort readings. Pipe tracing may support insulation when fluids must remain above a minimum temperature. A common mistake is treating insulation as permanent. It settles, cracks, and becomes wet over time. No method is flawless. Maintenance records should include inspection dates, surface readings, and repair details. The design may look efficient on paper, yet field conditions often disagree. That disagreement deserves investigation, not dismissal.
Selecting suitable insulation materials and thicknesses is one of the most practical ways to prevent heat loss in piping systems. The choice should begin with operating temperature, pipe diameter, ambient conditions, and allowable surface temperature. Hot water lines may need low-conductivity insulation, while chilled pipes require closed-cell materials that resist moisture. Wet insulation performs poorly.
Thickness matters as much as material. Engineers should calculate heat-transfer rates instead of choosing a convenient standard size. A thicker layer usually reduces heat loss, but extra thickness can create space, support, and maintenance problems. Pipe supports, valves, flanges, and joints also need careful treatment. Small uncovered areas can become visible thermal bridges.
Outdoor piping needs weather protection, especially against rain, sunlight, and mechanical damage. Indoor systems still need a continuous vapor barrier when condensation is possible. Material compatibility deserves attention; some insulation can corrode metal surfaces when moisture becomes trapped. Check temperature limits and local safety requirements.
Field inspections often reveal gaps around fittings or compressed sections. They are easy to miss. A perfect design is rare. One common mistake is trusting a thickness table without checking actual site conditions. Recalculate when the operating temperature changes, and measure surface temperatures after installation. The result may challenge the original design. That is useful information, not failure.
Heat often escapes through small interfaces, not the straight pipe. During field inspections, I have found loose flange covers, cracked sealant, and missing valve insulation near hot equipment. These details create thermal bridges and raise surface temperatures. Small gaps matter. The U.S. Department of Energy reports that properly insulated steam systems can reduce heat losses by up to 90 percent. That figure depends on insulation condition, temperature, moisture, and installation quality.
Use high-temperature gaskets suited to the fluid, pressure, and flange material. Replace flattened or hardened gaskets instead of tightening them repeatedly. Around valves, install removable insulation covers that fit tightly without blocking operation. Seal pipe openings with compatible, non-combustible materials where required. Avoid filling expansion gaps with rigid products; movement can reopen the joint. ISO 12241 provides calculation methods for insulation thickness and surface temperature, supporting safer, more consistent designs.
Inspect flange edges with a thermal camera during operation. A bright hot ring usually indicates contact loss or missing insulation. Check valve stems, drains, vents, and supports because these locations are frequently overlooked. DOE guidance also emphasizes repairing damaged insulation quickly, especially where water can enter. I have seen “temporary” wrapping remain for years. That is not a maintenance strategy. Records should include surface temperature, seal condition, repair date, and the person who verified the work.
In piping systems, thermal performance often fails at seams, not on broad insulation surfaces. I have found moisture entering through a small puncture near a valve. Water finds gaps. Use a continuous vapor retarder on cold lines, with sealed overlaps and carefully sealed penetrations. Choose jacketing for rain, washdown, sunlight, and chemical exposure. Metal jacketing needs properly closed joints. Flexible coverings require compatible sealants.
Keep insulation above standing water and provide drainage around supports. Poorly detailed pipe shoes can crush insulation and create a cold bridge. Protect elbows, flanges, and valve areas with shaped covers or rigid guards. These locations receive repeated knocks during maintenance.
Avoid compressing insulation when tightening bands or mounting inspection hardware.
Small errors matter.
Inspect after storms, cleaning, and nearby construction. Look for swollen sections, loose bands, torn jacketing, and staining beneath supports. Repair damaged barriers immediately, then dry the assembly before closing it. Wet insulation rarely recovers its original resistance.
For hot piping, check that jacketing remains stable at operating temperature. For cold piping, verify that the outer surface stays dry during peak humidity. I once underestimated a tiny opening around an instrument lead. It caused recurring condensation. That mistake changed our inspection checklist. No inspection plan is perfect, so record failures and revise details after real service.
Heat loss rarely begins with dramatic damage. It often starts at a wet seam, loose band, or compressed insulation. Inspect piping while the system operates, when cold spots become visible. Use a calibrated infrared camera, then confirm suspicious readings with surface thermometers. Check valves, flanges, supports, and expansion joints carefully. These locations move, leak heat, and expose gaps first. Record temperatures, weather conditions, insulation age, and surface moisture. A photograph beside each reading makes later comparisons more reliable.
Maintenance should remove damaged jacketing before adding new insulation. Dry the pipe completely; trapped moisture can accelerate corrosion beneath thermal protection. Replace missing sections with materials rated for the pipe temperature and environment. Seal joints firmly, but allow movement where the design requires it. Do not compress fibrous insulation around fittings. It loses thickness and performs poorly. Inspect drainage paths too. Rainwater entering through a small opening may travel several meters inside the jacket. This detail is commonly missed during routine maintenance.
Upgrades deserve a measured decision, not a thicker layer by habit. Compare heat-loss estimates with operating costs, safety needs, and access requirements. A thicker system may obstruct valves or overload supports. Use removable insulated covers around frequently serviced components. For long runs, improve vapor control and weather protection before increasing thickness. After installation, repeat thermal scans under similar operating conditions. Infrared readings can mislead on shiny metal or wet surfaces. No inspection plan is perfect; unusual results should be checked twice.
| Rank | Preventive Measure | Primary Heat-Loss Mechanism Addressed | Recommended Practice | Typical Energy- or Surface-Temperature Benefit | Inspection / Maintenance Interval | Key Performance Indicator |
|---|---|---|---|---|---|---|
| 1 | Install Correctly Sized Insulation | Conduction, convection, and radiation from the pipe surface | Select insulation thickness according to operating temperature, pipe diameter, ambient conditions, moisture exposure, and allowable surface temperature. | Typically reduces heat loss by 70–95% compared with an uninsulated pipe, depending on the design. | Verify installation quality during construction; inspect annually and after major repairs. | Insulation thickness, surface temperature, and calculated heat loss per metre |
| 2 | Seal Insulation Joints and Penetrations | Air leakage, thermal bridging, and moisture ingress | Use tightly fitted joints, sealed laps, weatherproof mastic, and properly sealed valve, flange, and support penetrations. | Can prevent localized losses of 5–20% in poorly sealed or heavily exposed sections. | Inspect every 6–12 months and after storms, washdowns, or mechanical work. | Visible gaps, wet insulation, damaged jacketing, and abnormal surface-temperature readings |
| 3 | Use Weatherproof Jacketing Outdoors | Wind-driven convection, rain penetration, ultraviolet exposure, and mechanical damage | Protect insulation with a continuous, durable outer jacket and maintain sealed overlaps, end caps, and drainage details. | Maintains designed thermal performance and can avoid 10–30% degradation caused by wet or damaged insulation. | Inspect twice a year and after severe weather; repair punctures and open seams promptly. | Jacket integrity, water ingress, corrosion beneath insulation, and insulation moisture content |
| 4 | Insulate Valves, Flanges, and Fittings | Increased surface area and thermal bridges at components | Fit removable or custom-made insulation covers around valves, flanges, strainers, expansion joints, and other heat-loss hotspots. | May reduce component heat loss by 50–90% where fittings were previously exposed. | Check quarterly in high-use areas and whenever components are opened for service. | Component surface temperature and percentage of exposed fittings covered |
| 5 | Eliminate Unnecessary Exposed Pipe Length | Heat loss from redundant branches, dead legs, and unused services | Remove abandoned pipework where safe, isolate unused branches, and shorten routes when system modifications are made. | Reduces avoidable heat loss in proportion to the removed or isolated length; savings are highest on high-temperature services. | Review during annual system audits and whenever process layouts change. | Insulated or isolated pipe length versus total installed pipe length |
| 6 | Maintain Steam Traps and Condensate Return | Live-steam loss, poor condensate drainage, and water hammer | Test steam traps, repair failed-open units, maintain strainers, and return usable condensate to the boiler or process system. | A failed-open trap can waste substantial steam; correcting trap failures often provides rapid energy savings. | Test at least annually; use more frequent checks for critical or high-load services. | Trap failure rate, condensate recovery rate, flash steam, and abnormal downstream temperature |
| 7 | Control Operating Temperature and Flow | Excess temperature difference and unnecessary circulation losses | Use properly calibrated sensors, automatic controls, variable-speed pumps, and set points that match actual process requirements. | Lowering temperature difference generally lowers heat loss; savings depend on process limits and operating hours. | Calibrate sensors at least annually and review set points monthly or after process changes. | Actual versus target temperature, flow rate, runtime, and energy use per production unit |
| 8 | Repair Damaged or Wet Insulation Quickly | Increased thermal conductivity caused by water, compression, gaps, or material deterioration | Replace saturated or compressed sections, dry affected areas where appropriate, and correct the source of leaks before reinstating insulation. | Restores much of the original thermal performance; wet insulation can lose a significant share of its insulating value. | Inspect monthly in wet or high-traffic areas and after any leak or impact. | Moisture level, surface-temperature anomalies, compression, and visible deterioration |
| 9 | Use Thermal Imaging and Temperature Surveys | Undetected hot spots, missing insulation, thermal bridges, and failed components | Conduct infrared surveys under stable operating conditions and compare results with design or historical temperature data. | Improves detection of abnormal heat loss before failures become visible or energy consumption rises significantly. | Perform annually and after insulation upgrades, process changes, or abnormal energy readings. | Number of anomalies found, corrected, and verified after repair |
| 10 | Upgrade Insulation at High-Temperature Hotspots | High heat flux at tanks, headers, pump bodies, supports, and frequently accessed sections | Prioritize upgrades using operating temperature, surface area, accessibility, annual operating hours, and return-on-investment analysis. | High-temperature upgrades can deliver strong energy savings when focused on large, continuously operating surfaces. | Review priorities annually and verify performance after each upgrade. | Heat-loss reduction, fuel or electricity savings, surface temperature, and payback period |
Heat often escapes through joints, flanges, valves, supports, and pipe openings. Small gaps create thermal bridges. Straight pipe surfaces may remain well insulated.
Replace flattened, cracked, or hardened gaskets. Repeated tightening may not restore a reliable seal. Choose materials suited to the fluid, pressure, and flange temperature.
Use removable insulation covers that fit closely around valves. They should allow normal operation and maintenance access. Do not block stems, drains, vents, or inspection points.
Use compatible, non-combustible sealing materials where required. Do not fill movement gaps with rigid products. Movement can reopen the joint.
Install a continuous vapor barrier on cold piping. Seal overlaps and penetrations carefully. Keep insulation above standing water, especially near supports.
Look for swollen insulation, loose bands, torn jacketing, and stains. Check areas after storms, cleaning, or nearby construction. Wet insulation rarely returns to its original performance.
Inspect piping during operation, when temperature differences are visible. Use a calibrated infrared camera, then verify unusual readings with a surface thermometer. Shiny metal can mislead you.
Record surface temperature, weather, moisture, insulation age, and repair dates. Add photographs beside measurement points. I once trusted a temporary wrap for too long. That was poor maintenance.
Preventing heat loss in piping systems starts with understanding where energy escapes, including exposed pipe surfaces, joints, valves, flanges, and openings. The most effective approach is to select insulation materials that match the operating temperature, environment, and pipe design, then apply an appropriate thickness to reduce heat transfer without creating unnecessary costs. Sealing gaps and connection points is equally important because small openings can significantly weaken the overall thermal barrier.
A complete strategy for how to prevent heat loss in piping systems must also include long-term protection. Insulation should be shielded from moisture, impact, chemicals, and weather conditions that may reduce its performance. Regular inspections can identify damaged coverings, compressed insulation, loose seals, or areas of condensation before they become serious problems. Scheduled maintenance and timely upgrades help preserve efficiency, improve process stability, reduce energy consumption, and extend the service life of the piping system.

Ampy Pipe